
How to M1R and M1Rp: Make One Right Increase Tutorial (with videos!)
Updated: Aug 27
Looking for a clean, nearly invisible increase in your knitting? Learning how to M1R is a really useful technique to have under your belt.
M1R is the standard knitting abbreviation for Make One Right, and it's a simple increase that creates one new stitch from the horizontal strand of yarn between two existing stitches.
When worked correctly, the new stitch leans towards the right. Its purl-side version is called M1Rp, or Make One Right Purlwise, which also creates a right-leaning increase when you look at it from the knit side of your work.

If you're looking for more information about increases in general, check out my How to Increase in Knitting: A Must-Read Beginner Knitters Guide.
Keep reading and I'll walk you through:
When to use M1R and M1Rp in knitting
M1R and M1Rp are great when you want to add a subtle, clean stitch without creating an obvious bump or hole.
They're commonly used for neat, almost invisible shaping, making them distinctly different from increases like KFB, which leaves a little bar, or a yarn over, which intentionally creates a hole.

I love Make One increases for garment shaping because they can look so clean, especially when worked over multiple rows – they create a really beautiful look in your knitting.
You'll often see M1R used in:
sweater shaping
raglan increases
underarm shaping
fitted tops, or tops with a notable degree of negative ease
M1R is also the natural partner to M1L (Make One Left). Patterns very often use the two together because the increases mirror one another and help the shaping move neatly in opposite directions.
If you haven't tried the other side yet, my How to M1L and M1Lp tutorial takes you through it step by step.
How to Make One Right in Knitting – Step by Step
Use M1R when your pattern asks you to make one right on the knit side of your work.
Knit to the point where your pattern tells you to increase.
Before knitting the next stitch on the left-hand needle, identify the horizontal bar of yarn that stretches between the stitch on your right needle and the stitch on your left.
Insert your left-hand needle under this bar from back to front.
The lifted strand will now sit on your left needle.
Knit into the front leg of the lifted strand as you normally would.
Continue knitting as normal.
You've now made one additional stitch, and your increase will lean slightly towards the right.
—
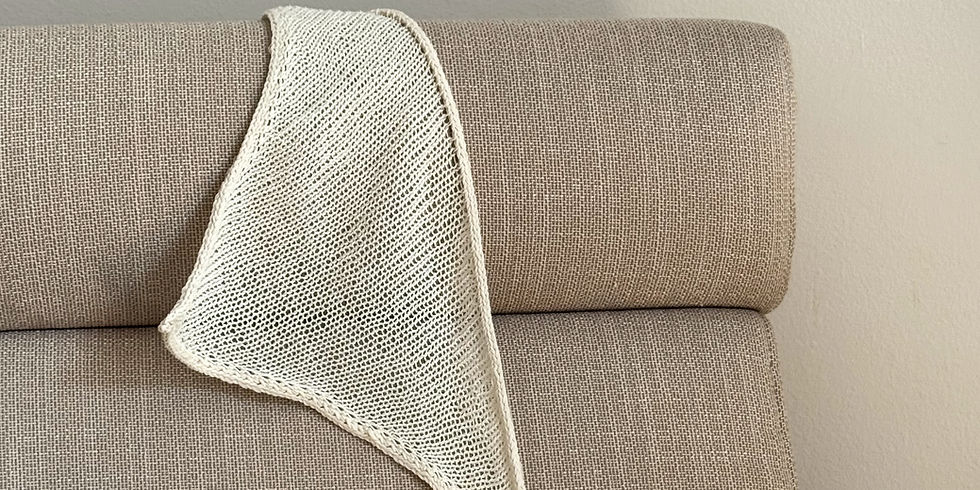
Looking for an easy-to-knit pattern, packed full of tutorial videos, to help you get the hang of M1L/M1R? The free pattern for my Blueberry Bandana is out now!
—
How to Work M1Rp (Make One Right Purl) – Step by Step
M1Rp is the purl-side version of M1R, and it creates a right-leaning increase when viewed from the knit side of your work. You'll use it when a pattern asks you to make one right while purling.
Purl to the point where your pattern tells you to increase.
Find the horizontal bar of yarn between the stitch on your right needle and the stitch on your left needle.
Insert your left-hand needle under the bar from back to front.
The lifted strand should now sit on your left needle.
Bring your working yarn into position for purling (if it's not already there!) and insert your right-hand needle through the front leg of the lifted strand, as if to purl.
Wrap your yarn and purl the lifted strand.
Slip the stitch off the left-hand needle and continue purling as normal.
If this is your first time working Make One increases on a purl row, slow it down. Once you've worked a few, finding and picking up that horizontal bar starts to become much more automatic.
An Easy Way to Remember M1R vs. M1L
Still mixing up which way to pick up the strand? This is the memory trick I use:
"Right" has 5 letters, just like "front".
For M1R, pick up the strand from back to front, then knit into the front of the lifted strand.
And for its partner:
"Left" has 4 letters, just like "back".
M1L is picked up from front to back and then worked through the back of the lifted strand.
It's a slightly silly trick, but honestly, those are usually the ones that stick!
Common Mistakes & Fixes When Working M1R
Why Does My M1R Leave a Hole?

If your M1R leaves a hole, check how you've worked into the strand after picking it up.
For M1R, pick up the horizontal bar from back to front, then knit into its front leg.
The combination of those two movements twists the strand closed.
If the strand isn't twisted, you're effectively creating a tiny eyelet rather than the subtle increase you were aiming for.
Why Is My M1R So Tight?
A little resistance is normal.
You're taking the horizontal strand between two existing stitches and turning it into a brand-new stitch, so there simply isn't as much yarn available as there is in a normal stitch.
If you're really struggling to get your needle into it, pay attention to the tension of the stitches immediately before the increase. Pulling those stitches very tightly makes the bar you're about to pick up shorter too.
M1R and M1L can also become particularly tight if they're worked across several consecutive rows, which is one reason you'll often see these increases spaced every other row, or every few rows.
Why Is My M1R Leaning the Wrong Way?
First, check the direction you used to pick up the bar.
For M1R, your left-hand needle needs to travel from the back of your work towards the front when picking up the horizontal strand.
If you picked it up front to back and worked through the back instead, congratulations: you've probably just made an M1L!
It's an easy mistake and, conveniently, also a pretty good way of learning the difference between the two.
Why Doesn't My M1R Look Invisible?
M1R is minimal rather than truly invisible.
Depending on the yarn you're using, your gauge and your tension, you'll probably still be able to see where you've increased when you look closely.
The aim is for the increase to blend neatly into the surrounding stitches rather than disappear completely.
If yours looks particularly prominent, check that you haven't loosened the stitches either side while picking up the bar. Keeping your tension consistent usually makes a bigger difference than trying to pull the new stitch extra tight afterwards.
Why Does My M1Rp Look Different From My M1R?
Remember that you're working M1Rp from the purl, or wrong, side of your fabric.
Turn the work around and look at the increase from the knit side before deciding something has gone wrong. That's the side from which we describe the increase as right-leaning.
If it still looks unusual, as mentioned in previous problem-shooting responses, check that you've worked your stitch correctly, i.e. you've picked up the strand from back to front and purled through the front leg.
Can I Use Another Increase Instead of M1R?
Sometimes, but I wouldn't automatically swap it.
If you really want to substitute M1R while keeping a similar direction of shaping, a Right Lifted Increase is worth considering. I have a full tutorial for that technique too.
But different increases produce different-looking fabric.
A yarn over will create a hole. KFB leaves a visible bar. A lifted increase uses a stitch from the row below rather than the strand between your stitches and tightens up the tension more than a standard M1R.
None of those techniques are wrong, but switching them can change both the appearance and direction of the shaping your pattern designer intended.
If your pattern specifically asks for M1R or M1Rp, I'd stick with it unless you have a particular reason to change it.




![⭐️ I’m looking for TEST KNITTERS for The Again Sweatshirt ✨
I’m looking for one EU-based or Swiss knitter for each size from XS–5X to help me test the pattern, and I’m incredibly grateful to be doing this one with the support of @langyarns_official 🥰
They’ve very kindly offered to provide each selected tester with the full sweatshirt quantity of Donegal Woolen Spun needed for their size, so all you’ll need to bring to the test is your needles, your time and your honest feedback along the way 💖
The Again Sweatshirt is inspired by my absolute favourite old graphic sweatshirt from mine and my husband’s honeymoon, something I reach for again and again (hence the name!). It’s worked top-down in stockinette, with soft shoulder shaping and two alternative ribbing finishes.
Here are the practical bits:
🗓️ Test runs from when your yarn arrives until January 25th
🇪🇺 One EU-based tester per size
📏 XS (S) M (L) XL (2X) 3X (4X) 5X
🪡 Confident Beginner
🧶 Lang Yarns Donegal Woolen Spun provided for each tester
💬 We’ll have a group chat to share progress and ask questions
📧 I’ll contact applicants on October 10th
Designed to fit bust:
76 (86) 96 (106.5) 117 (127) 137 (147) 158 cm
[30 (33¾) 37¾ (42) 46 (50) 54 (57¾) 62¼ inches]
The yarn will be shipped directly by Lang Yarns, so I’ll need to collect a shipping address from each selected tester.
Whether you’ve done lots of test knits or have never done one before, you’re very welcome to apply. I’m looking for people who feel like they’d love this knit, can commit to the timeframe and will give me honest feedback along the way 🥰
Applications are open now through the link in my bio.
A big thank you to Lang Yarns for making it possible for me to provide the yarn for this test. I’m really looking forward to seeing nine Again Sweatshirts starting to tane shape! 🥹
#testknit #testknitting #testknittersneeded](https://scontent-den2-1.cdninstagram.com/v/t51.82787-15/831423616_17969138016187083_6121137655494974124_n.jpg?stp=dst-jpg_e35_tt6&_nc_cat=103&ccb=7-5&_nc_sid=18de74&efg=eyJlZmdfdGFnIjoiRkVFRC5iZXN0X2ltYWdlX3VybGdlbi5DMyJ9&_nc_ohc=REV-8YVmf1AQ7kNvwEEX3ZB&_nc_oc=AdpFSk3iGQzseak2I3ZOSrS2G0mUx7V7e3zlx9sZz5YzIB4kTPDInXlxqYuqP3lWdCo&_nc_zt=23&_nc_ht=scontent-den2-1.cdninstagram.com&edm=ANo9K5cEAAAA&_nc_gid=BHngOEBeo6D2TOHprnXqmA&_nc_tpa=Q5bMBQKr-YpjLP3ktUJsYIVIU9BVroJCoLOr00ldg-xDLTnLYP0PxagymIu44iKR5wh7KGkQ5il9Yru5&oh=00_AQMj2PeZDGwbf4AaW4dj2yE9hMtgTBBvzoOJg0YZOBGB1A&oe=6AD1CB5B)

![⭐️ TEST KNITTERS NEEDED – It’s finally test knit time for the Again Sweatshirt! 🤎
I’ve been working on this one for quite a while now, and I’m so excited (and slightly nervous as always!) to finally put it into the hands of some test knitters.
The Again Sweatshirt is a really relaxed, oversized sweater, inspired by that favourite old sweatshirt you find yourself reaching for again and again. It’s worked top-down, mostly in simple stockinette, with gentle shoulder shaping and two different ribbing options.
For this test, I’m looking for one EU-based knitter for each size from XS–5X.
And I’m incredibly grateful that @langyarns_official are supporting the test by providing each selected knitter with their Donegal Woolen Spun 🤎 Your yarn will be sent directly from Lang Yarns, so I’ll need to collect a shipping address from the selected testers.
A few important details:
🗓️ Test runs from when your yarn arrives until January 25th
🇪🇺 EU-based knitters
📏 One knitter per size: XS (S) M (L) XL (2X) 3X (4X) 5X
🪡 Confident Beginner
🧶 Lang Yarns Donegal Woolen Spun provided
💬 We’ll have a group chat to share progress, questions and help each other along the way
📧 I’ll contact everyone who applied on October 10th to let you know whether you’ve been selected
Designed to fit bust:
76 (86) 96 (106.5) 117 (127) 137 (147) 158 cm
[30 (33¾) 37¾ (42) 46 (50) 54 (57¾) 62¼ inches]
Yarn required:
9 (10) 11 (12) 12 (13) 14 (15) 16 balls
Gauge:
18 sts × 28 rows = 10 × 10 cm [4 × 4 inches] in stockinette on 4.5 mm [US 7] needles.
Applications are open now through the link in my bio 🥰
And if you’ve already joined my test knitter pool, you don’t need to do anything. I’ll automatically consider you for this test too!
#testknittersneeded #testknit #sweatertestknit #ad #sponsored](https://scontent-den2-1.cdninstagram.com/v/t51.82787-15/827856167_17968448112187083_8984906407539923385_n.jpg?stp=dst-jpg_e35_tt6&_nc_cat=100&ccb=7-5&_nc_sid=18de74&efg=eyJlZmdfdGFnIjoiQ0xJUFMuYmVzdF9pbWFnZV91cmxnZW4uQzMifQ%3D%3D&_nc_ohc=b5BpDKbafyYQ7kNvwGIRrKk&_nc_oc=AdomWxvvN-LjwhepbOGyVMHkE8d4YL9ER1mnLJVZCdrtp5nZ_LnNx8-13SB_STqWkdA&_nc_zt=23&_nc_ht=scontent-den2-1.cdninstagram.com&edm=ANo9K5cEAAAA&_nc_gid=BHngOEBeo6D2TOHprnXqmA&_nc_tpa=Q5bMBQL6PPB5uFLC_VnHWlG6VO4Fw-RIcyJXMWY3js1YcwEZ2bDQ6lSHAGPsQ-x1LuPrOAFfeLZ9KbgV&oh=00_AQOsQJc6gJ2RGHbxzOOWxnXvnxGl850lWKpyR-Ieoq6k1w&oe=6AD1EF92)


Comments